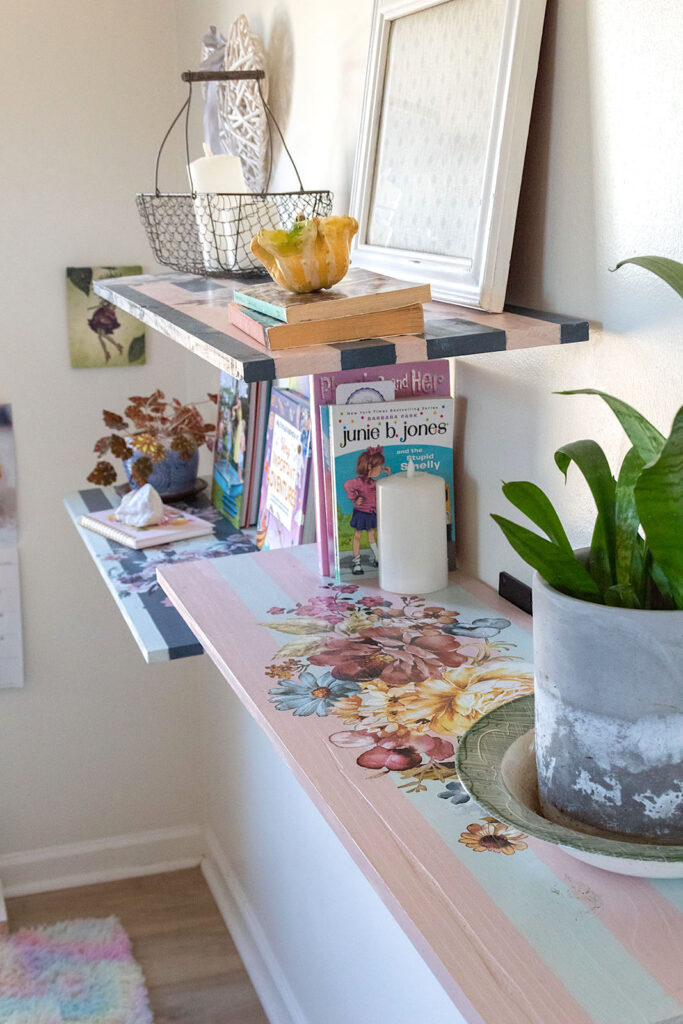
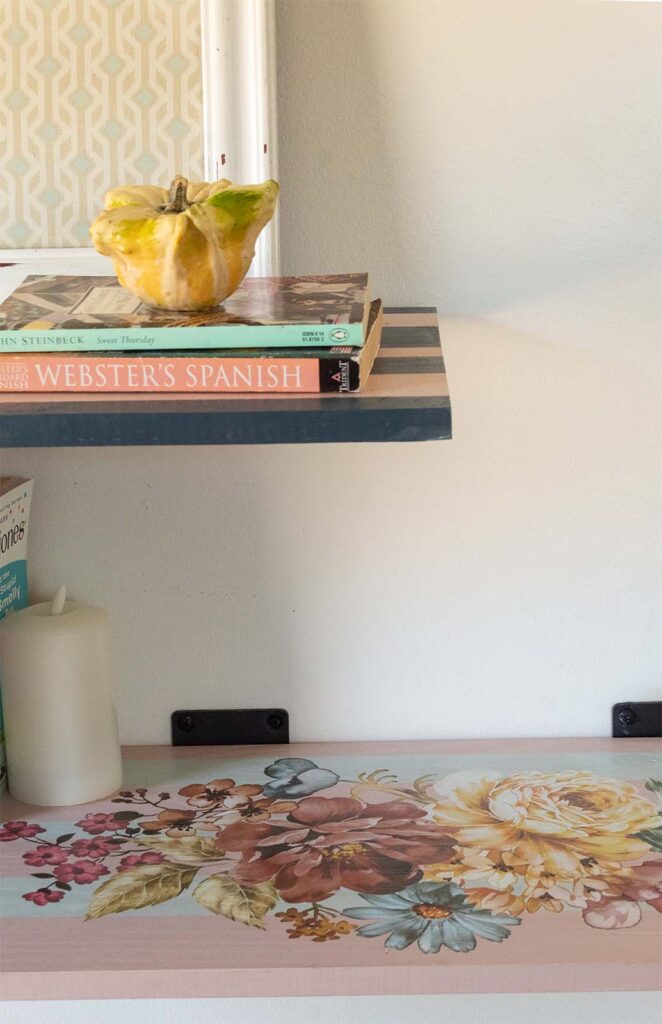
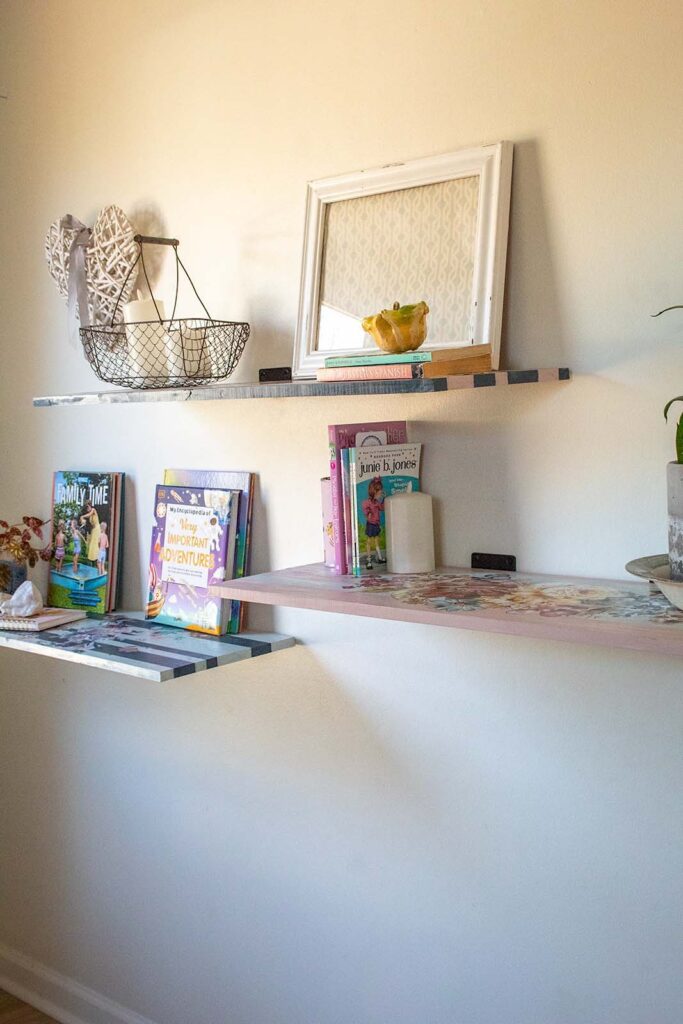
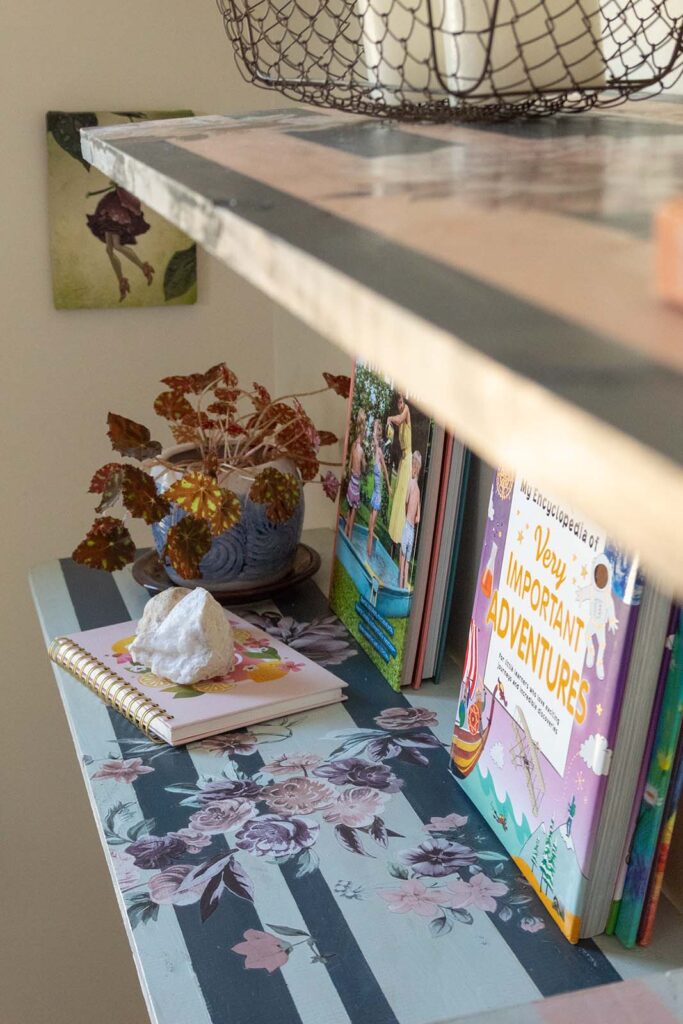
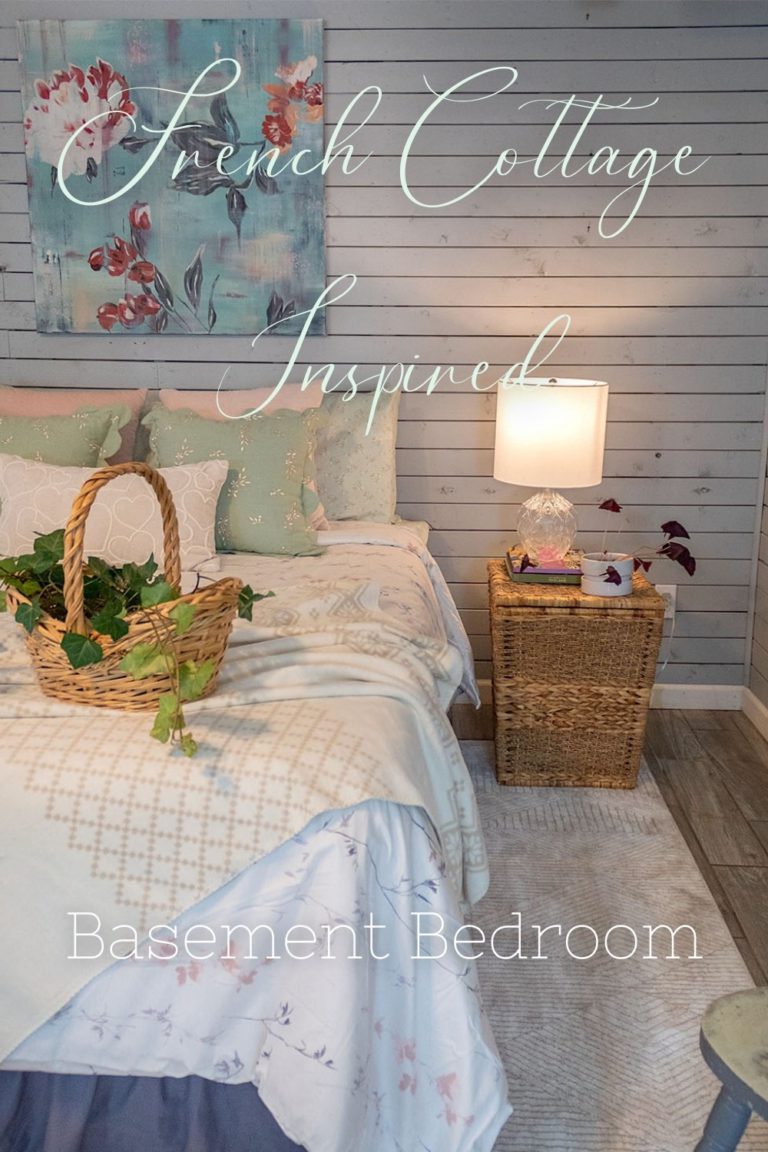
Hello friends, I couldn’t wait to share with you the shelves I made for our daughter’s bedroom. We’ve been slowly chewing away on our list of house projects. In this post you’ll get to see how I made these lovely wall shelves. When I began working on them I didn’t have a clear vision for the final look. But a few stripes and bouquets later, they turned into beautiful decorative shelves with Victorian charm and a touch of mad hatter.
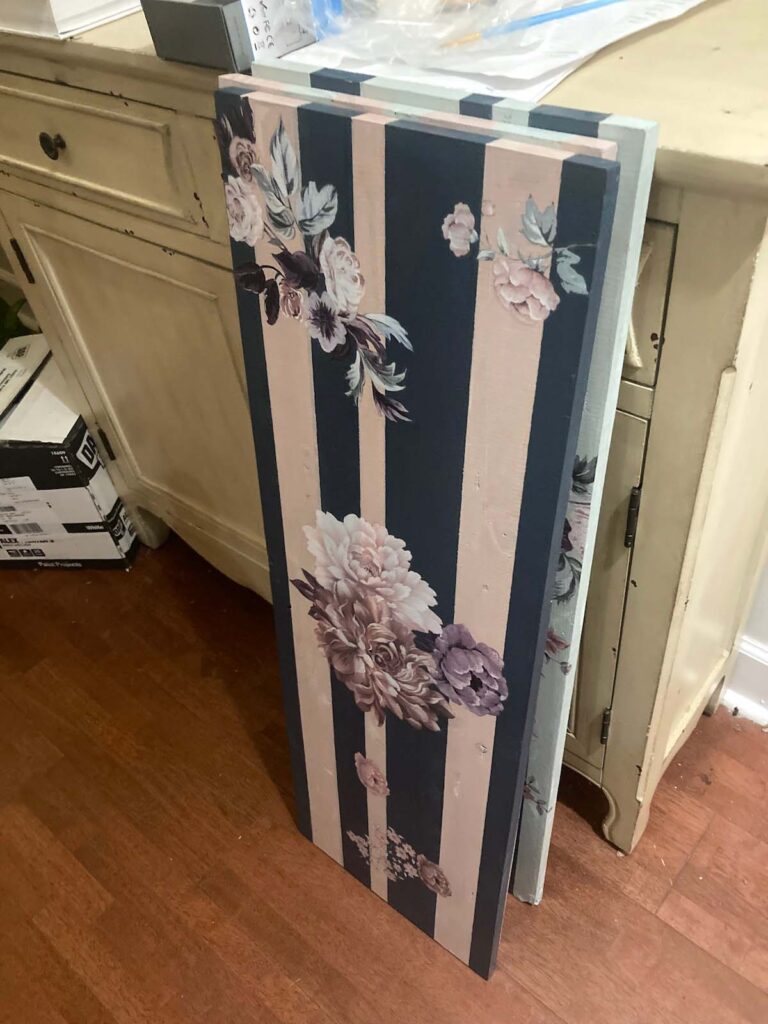
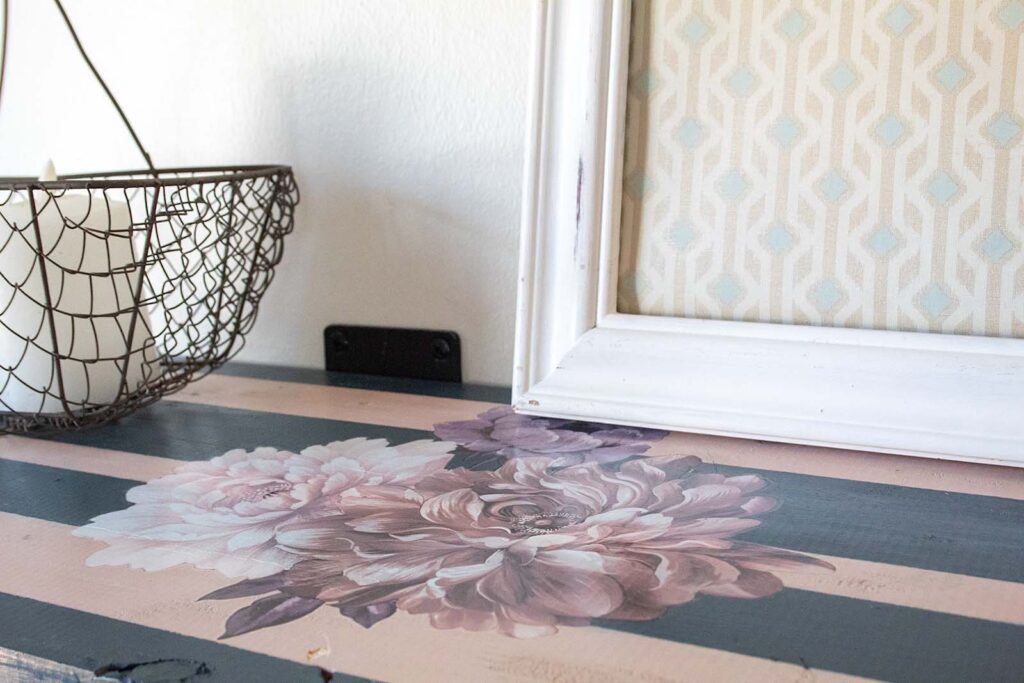
These shelves are easy to make but they do require a little patience. I took the time to paint stripes on both sides of each shelf using different color combinations. Once the shelves were all painted, I added furniture rub on transfers to each shelf for added beauty. You could of course choose to omit the transfers and just go for a striped look, which is also quite stylish.
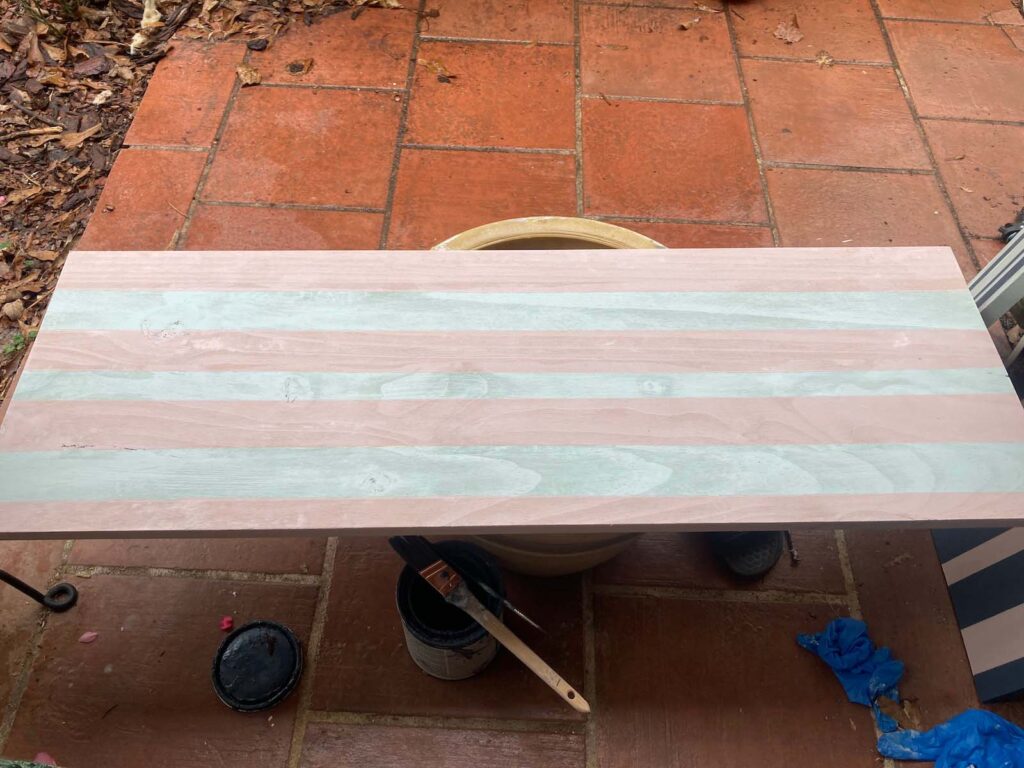
Using high grit sand paper, I went over all the surfaces of the boards. You can use an electric sander too, but I quickly sanded the boards by hand for a smooth, soft finish.
Then I applied painters tape to one side of the boards at a time. I placed the tape strips in different positions to create stripes of varying widths. Then I gave each color two coats of chalk paint.
Next I removed the painters tape and touched up by hand any messy edges.
Disclosure: Some of the links provided are affiliate links. By purchasing through these links it supports this blog and the work we do and there is no extra cost to you. If you would like to read our full disclosure, click HERE.
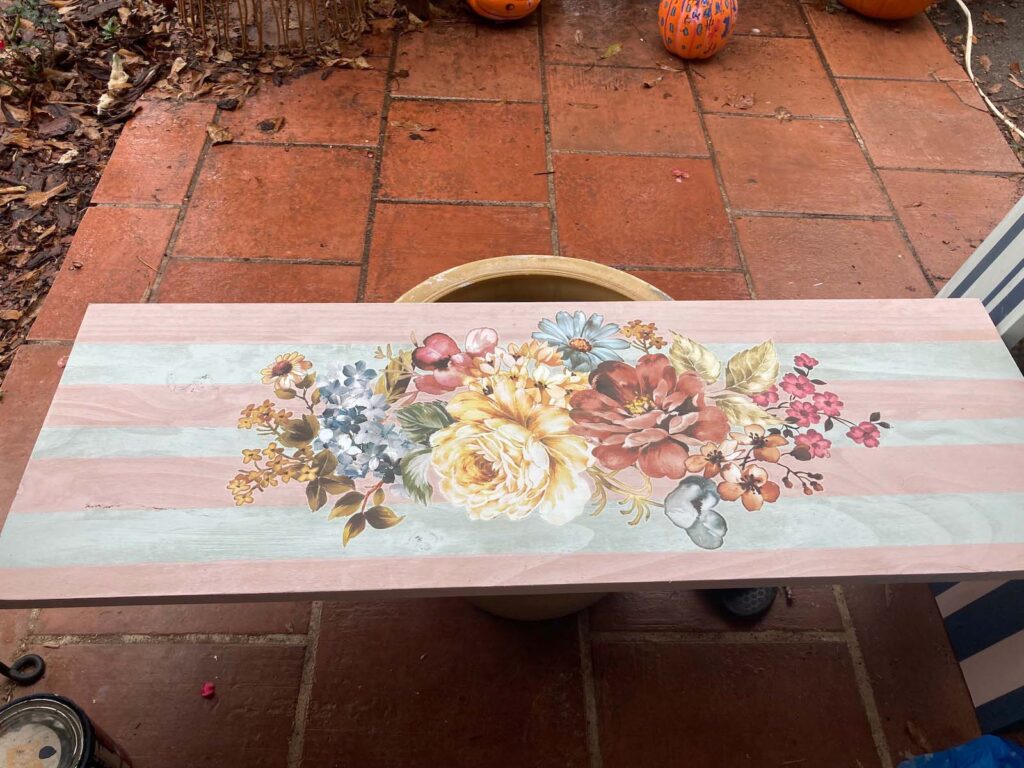
Step 2. Apply The Furniture Transfer
Adding the transfers to the shelves over the stripes created a magical look, if I do say so myself. The flower bouquets added gorgeous whimsy and the stripes gave them a fun, candy cane like touch.
To See How I Applied The Transfers Watch This Video
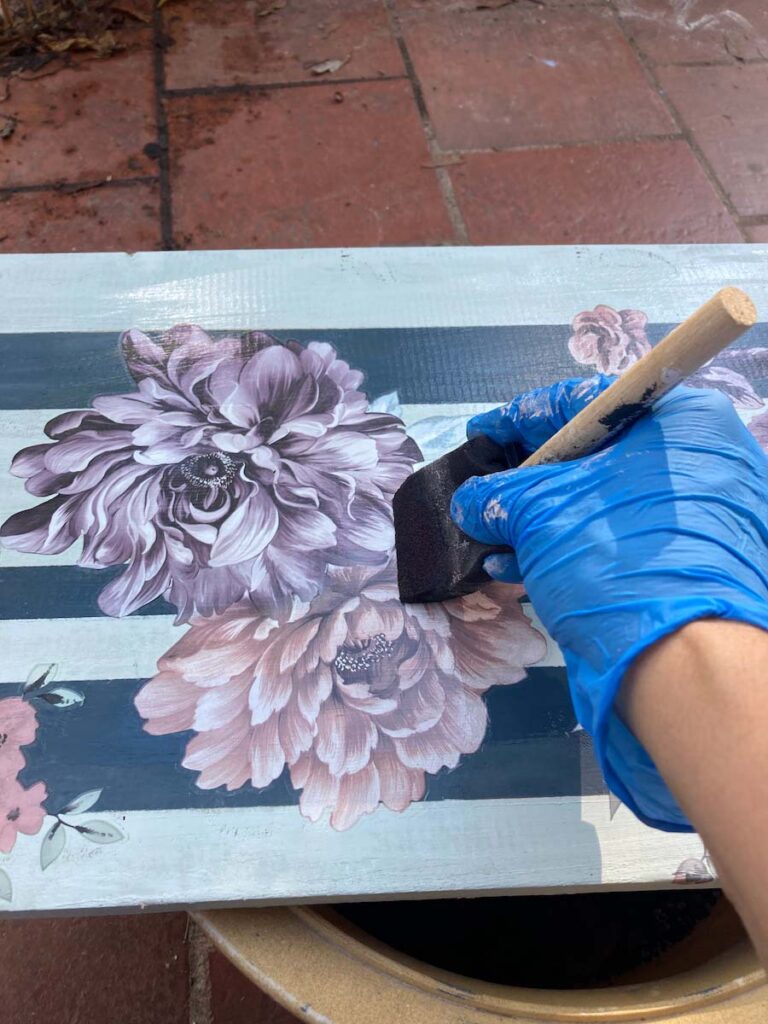
Step 3. Seal Your Shelves
I used a satin clear coat to seal the shelves. Make sure you watch the video above to see how to first burnish your transfers before applying a clear coat. I recommend using a foam brush to apply the clear coat. This will prevent brush strokes on your finish. You could also use a finishing wax to seal the transfers.
Step 4. Add Mounting Brackets and Hang Your Shelves
For the final step, it is time to add mounting brackets to your shelves. I purchased these bracketsbecause they were affordable and also less noticeable than some other ones. I wanted to avoid bulky brackets that would take away from the beauty of the shelves. These brackets worked well.
Well friends, what did you think of the floral shelves? Aren’t they so pretty? I hope you liked this post. Be sure to subscribe so you don’t miss a thing!
I love how transfers can transform plain shelves into unique statement pieces. It’s a creative way to personalize decor without much hassle. Would love to see more project ideas using this technique!


I love how transfers can transform plain shelves into unique statement pieces. It’s a creative way to personalize decor without much hassle. Would love to see more project ideas using this technique!
Thank you for your comment. Yes, transfers add instant charm without much hassle like you said.
If you type “transfer” in the search bar on my blog you’ll find several other fun transfer projects.
Here are a couple:
https://www.nooksinbloom.com/french-ceramics-table/
https://youtu.be/3M3UJ1VDv34
Artistic and doable
Good job
Thank you!